
Introduction
Nail art has transformed from a simple grooming routine into a vibrant form of self-expression and creativity. As the seasons change, so do the trends in nail design, making seasonal themes, especially spring, a delightful source of inspiration for nail enthusiasts. The arrival of spring brings with it a palette of pastel shades and floral motifs that perfectly complement the rejuvenation of nature. Among the myriad of nail art styles, the classic French manicure stands out due to its versatility and elegance. Are you ready to brighten your nails with a spring flair?
“Creating a cozy reading nook is all about maximizing comfort in a small space. It’s about intentional design that serves both function and feeling.”
– Interior Design Magazine
The Basics of French Nail Art
French nail art, often referred to as the French manicure, is characterized by its clean, natural look with white tips and a nude or soft pink base. This timeless style dates back to the 1970s when it was popularized by French fashion designers as a way to showcase natural beauty. Its simplicity allows for endless variations, making it a staple in nail art.
To create a classic French manicure, you’ll need a few essential tools and materials. Start with a good quality base coat, white nail polish for the tips, and a pink or beige polish for the base. You may also want some nail tape or a fine brush for precision. Before diving into the artistic side of nail care, remember that a solid foundation is key; take time to ensure your nails are clean, shaped, and well-moisturized.
Nail care is crucial before applying any nail art. Start with healthy nails to avoid issues like chipping or peeling, which can detract from your design. Regularly moisturizing your cuticles and using a strengthening base coat can promote nail health, setting the stage for your artistic endeavors.
Spring Color Palette Inspiration
Spring is synonymous with vibrant colors, and your nail art can reflect the season’s beauty through a carefully curated color palette. Think pastels like soft pinks, lilacs, and mint greens, alongside bolder hues like sunny yellows and bright corals. These colors not only evoke the essence of spring but also allow you to mix and match for unique designs.
Choosing a color palette involves considering the overall theme you want to convey. For a floral-inspired look, opt for delicate pastels that mimic blooming flowers, or go for vibrant shades to create an energetic vibe. Mixing colors can lead to stunning results; consider pairing soft lavender with a bright fuchsia for a striking contrast.
Here are some suggested color combinations for various spring themes:
| Theme | Color Combination | Suggested Design |
|---|---|---|
| Floral | Soft Pink + Lavender | Floral Accents |
| Sunshine | Bright Yellow + Coral | Geometric Patterns |
| Pastel Dreams | Mint Green + Baby Blue | Ombre Effect |
Choosing colors that resonate with your personality while reflecting the season can make your nail art a true reflection of you!
Spring-Inspired French Nail Art Designs
Now that you’ve chosen your color palette, it’s time to dive into creating stunning spring-inspired French nail art designs. Here are some innovative ideas to get your creativity flowing:
Classic Floral Accents: One of the most charming ways to enhance your French tips is by adding floral accents. Start with your classic French manicure, then use a fine brush or dotting tool to paint small flowers at the base of your nails or along the tips. Consider using a pastel base color with bright floral designs for a cheerful spring look.
Ombre French Tips: The ombre technique has gained popularity in recent years, providing a modern twist to the traditional French manicure. To achieve this look, start with a light base coat and gradually blend your chosen colors from the tips to the base. For instance, a soft pink fading into a deeper rose can create a stunning gradient effect that embodies the essence of spring.
Geometric Spring Patterns: Geometric designs can add a contemporary vibe to your French tips. Use tape to create crisp lines and shapes on the nails, combining various spring colors. Triangles, stripes, or even polka dots can be incorporated into your design for a playful touch.
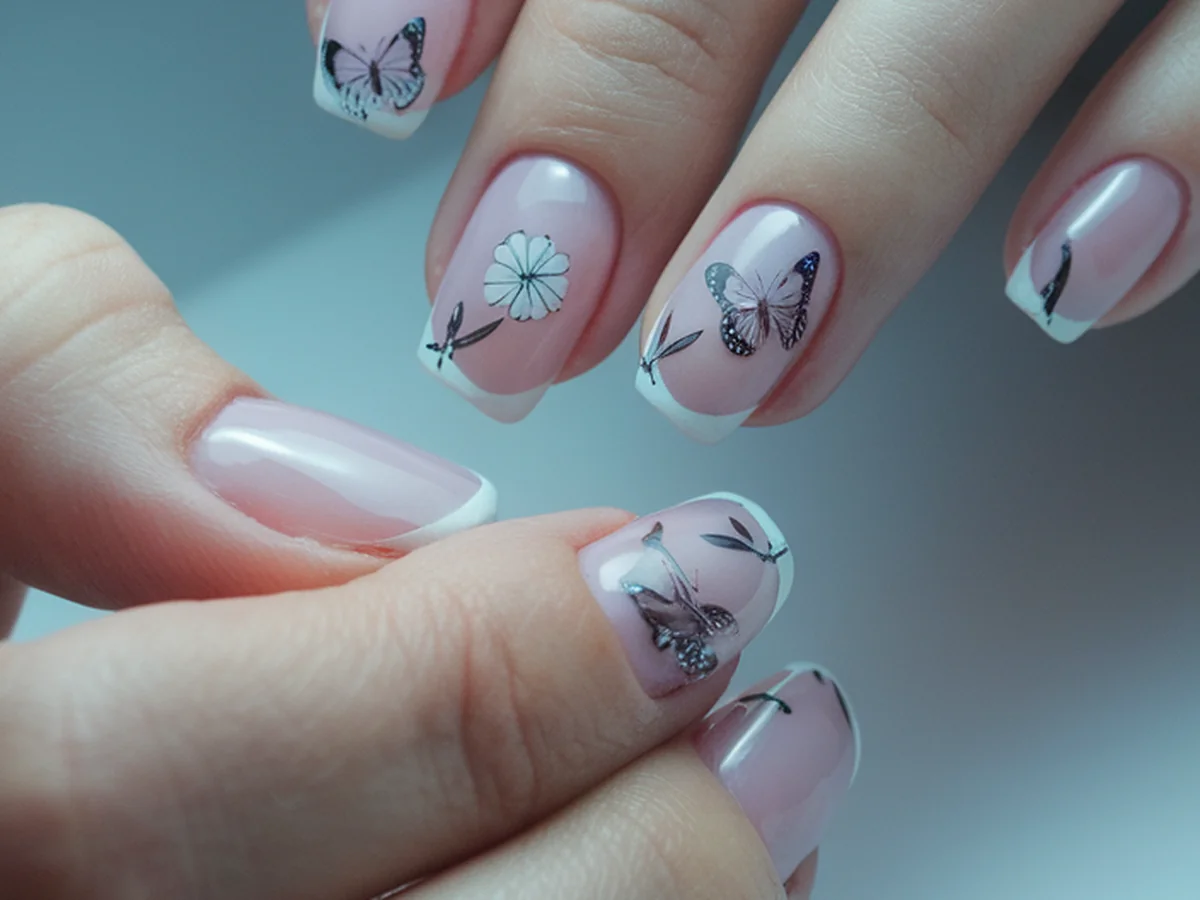
Nature-Inspired Designs: Incorporating elements from nature, such as leaves or butterflies, can evoke the feeling of spring. Paint delicate leaves along the sides of your French tips, or use a butterfly motif on one or two accent nails. The key is to keep the designs light and airy to reflect the season’s spirit.
Tools and Techniques for Nail Art Mastery
To create stunning nail art, having the right tools is essential. Here’s a list of must-have tools for nail art mastery:
- Fine nail brushes for detailed designs
- Dotting tools for creating dots and small designs
- Sponges for blending colors, especially for ombre techniques
- Nail tape for clean lines and geometric designs
- Quality nail polish and a durable topcoat for longevity
Once you have your tools ready, mastering some techniques will enhance your nail art skills. For applying and blending colors effectively, consider the sponge technique for gradients or ombre effects. This involves dabbing the sponge onto your nails to achieve a seamless blend.
Achieving clean lines is crucial in nail art. A steady hand is vital, so take your time while painting, and don’t rush the process. If you make a mistake, a small brush dipped in nail polish remover can help fix it without ruining the entire design. Lastly, using high-quality nail polish can make a significant difference in the final result, ensuring vibrant colors and a lasting finish.
Step-by-Step Tutorial: Creating Your Own Spring French Nail Art
Now that you’re equipped with knowledge and inspiration, let’s break down a simple step-by-step tutorial for creating your own spring French nail art. We’ll focus on a classic floral accent design.
Preparation: Start by cleaning and priming your nails. Remove any old nail polish and wash your hands thoroughly. Push back cuticles gently and shape your nails to your desired length.
Base Coat Application: Apply a quality base coat to protect your nails and ensure a smooth surface. Allow it to dry completely before proceeding to the next step.
Creating the Design:
1. Apply two coats of your chosen base color (such as soft pink) to all nails, ensuring each coat dries before adding the next.
2. Use a fine brush or nail tape to create the French tips with white polish. Ensure the line is smooth and even.
3. Once the white tips have dried, use a dotting tool to add small flowers at the base of your nails. Choose bright colors that contrast with your base for a lively look.
4. Finish with a quality topcoat to seal the design and add shine. This will also help your design last longer.
Curing Time and Finishing Touches: Allow your nails to dry completely. If you’re using gel polish, follow the curing instructions for your lamp. Once dry, admire your beautiful spring-inspired French nail art!
Common Mistakes and How to Avoid Them
Embarking on your nail art journey may come with a few bumps along the way. Here are some common mistakes and tips on how to avoid them.
Messy Lines: One of the most common pitfalls is creating uneven or messy lines when painting tips. To combat this, use nail tape for precise edges or practice your steady hand on scrap paper first.
Chips and Peeling: If your polish chips easily, it could be due to skipping the base coat or topcoat. Always apply both to protect your design and enhance durability.
Color Clumping: Sometimes, colors can become clumpy during application. Ensure each coat dries fully before applying another to prevent this.
Fixing Mistakes: If you accidentally smudge or make a mistake, don’t fret! Use a small brush dipped in remover to clean up the area without starting over.
Maintaining Nail Art Longevity: To keep your nail art looking fresh, avoid harsh chemicals and wear gloves when doing chores. Regularly reapply a topcoat to maintain shine and protect your design.
Showcasing Your Spring Nail Art Creations
Now that you’ve crafted your spring nail art, it’s time to show it off! Social media platforms are a fantastic way to share your designs. Consider creating an Instagram account solely for your nail art, where you can post photos of your creations, along with tips and tutorials.
Taking the perfect photo is crucial for showcasing your work. Use natural light to highlight the colors and details of your nail art. Experiment with different angles, and consider using props like flowers or pastel backgrounds to enhance your photos.
Engaging with the nail art community online can provide valuable feedback and inspiration. Join nail art groups on social media or participate in challenges to connect with other enthusiasts. Additionally, consider entering local nail art contests or workshops to showcase your skills and learn from others in the community.
Conclusion
Designing spring-inspired French nail art is not just about aesthetics; it’s a joyful journey of creativity and self-expression. As you experiment with colors and designs, you’ll discover your unique style while embracing the beauty of the season. Remember, each nail you paint is an opportunity to express who you are, and the possibilities are endless. So grab your tools, unleash your creativity, and don’t forget to share your stunning spring creations with the world—your nails deserve to shine!
Frequently Asked Questions
What is the best way to remove nail art without damaging my nails?
To safely remove nail art, soak a cotton ball in acetone or a non-acetone nail polish remover and place it on the nail for about 10-15 minutes. Wrap it with aluminum foil to enhance the process, then gently wipe off the polish. Avoid peeling or scraping, as this can damage the nail surface.
How can I make my nail art last longer?
To prolong the life of your nail art, always apply a high-quality base coat and finish with a durable topcoat. Avoid exposing your nails to harsh chemicals and wear gloves while doing household chores. Reapplying the topcoat every few days can also help maintain shine and prevent chipping.
Can I use regular nail polish for nail art designs?
Yes, regular nail polish can be used for nail art designs! However, for intricate designs, consider using professional nail art polishes, as they often have a thinner consistency for precise application. Ensure that whatever polish you use is of good quality to prevent chipping.
Is nail art safe for everyone?
Generally, nail art is safe for most people. However, if you have allergies to certain polish ingredients or have sensitive skin, it’s essential to choose hypoallergenic products. If you have any concerns, consult with a dermatologist or nail technician.
How often should I change my nail art?
It depends on personal preference and nail health. Many people change their nail art every 1-2 weeks. However, if you notice chipping or if your nails grow out, it’s a good idea to refresh your design. Always prioritize nail health by allowing your nails to breathe between applications.